
PEB Secondary System
Secondary system
Between the frames and the skin.
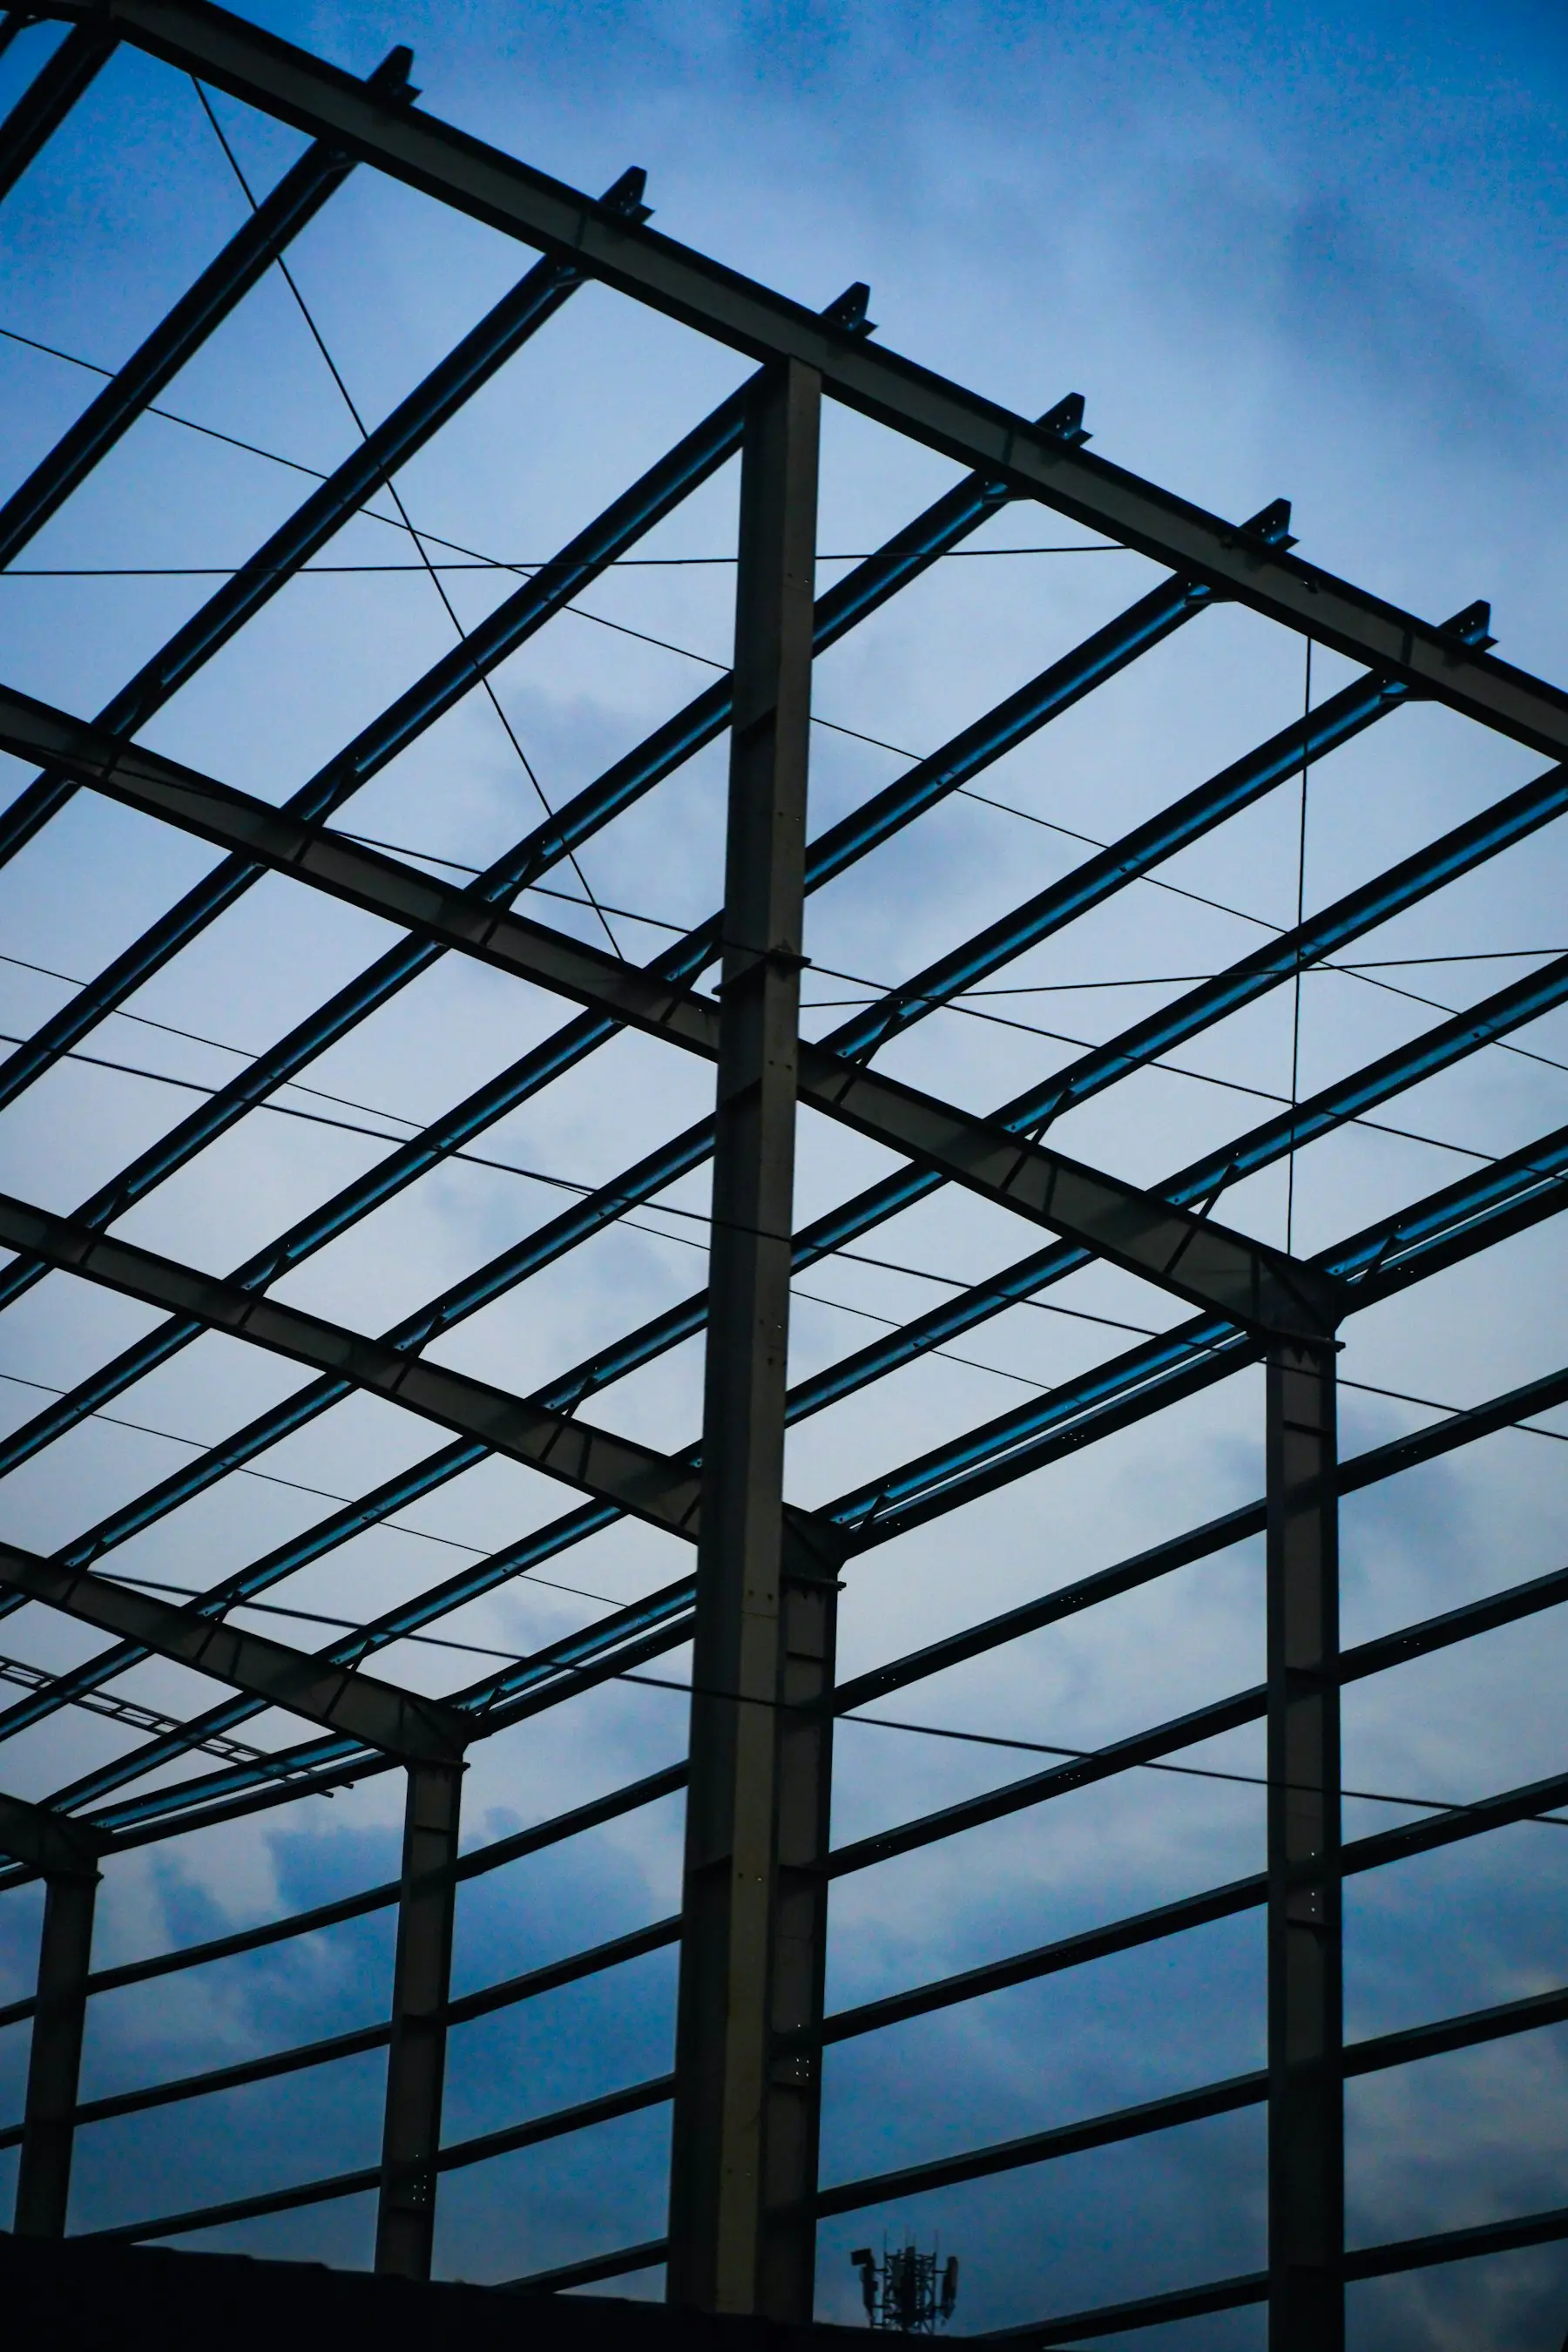
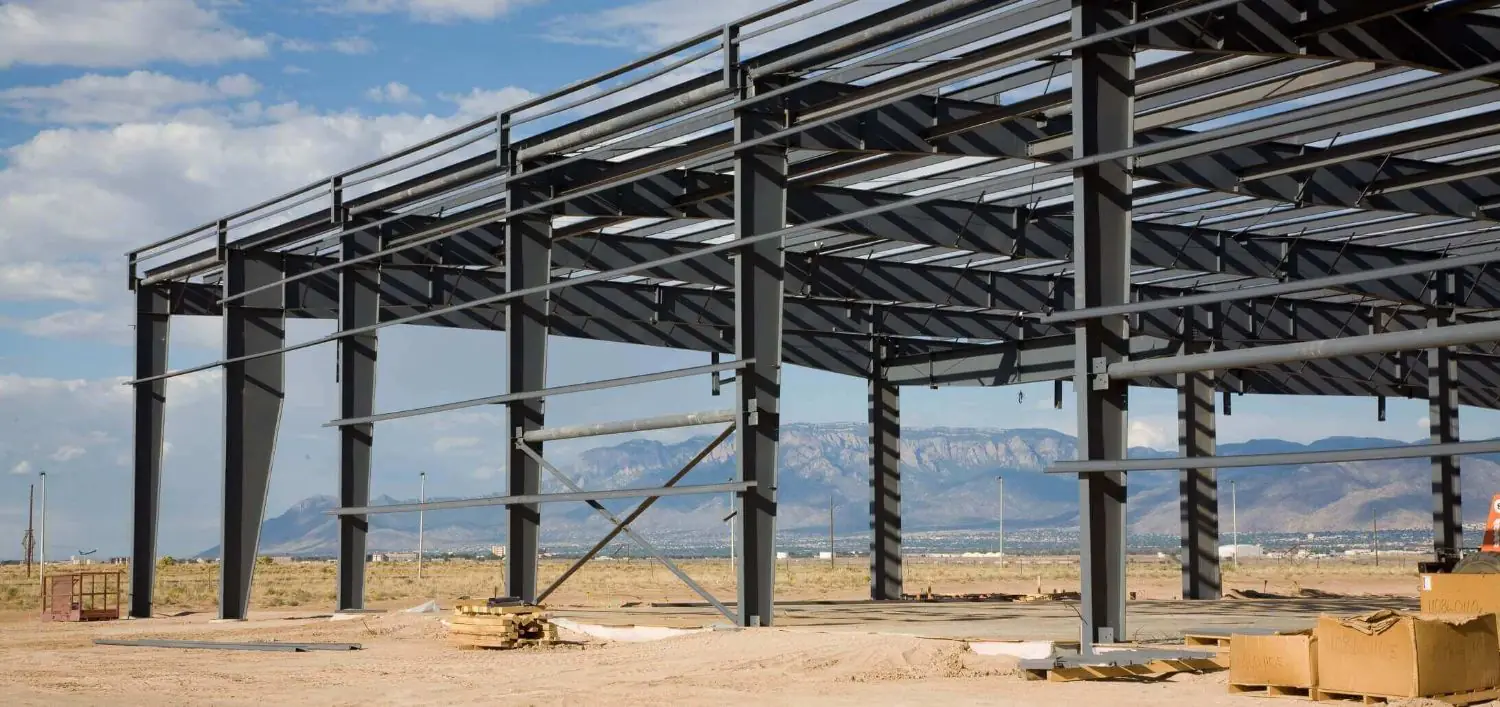
The secondary system is the layer between the frames and the skin: purlins on the roof, girts on the walls and an eave strut where the two meet, spanning from frame to frame and carrying the sheeting.
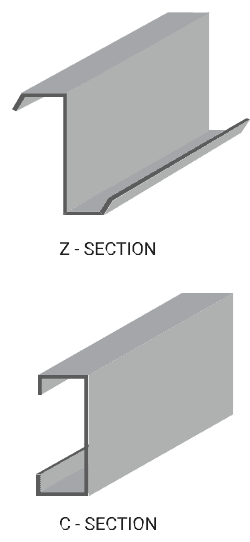
Purlins, girts and eave struts are light members, roll-formed from high-tensile steel into Z and C profiles rather than welded from plate. They span the bay between one main frame and the next, commonly 8–10 m, take the load from the roof and wall sheeting into the frames, and in doing so brace the rafters and columns against buckling. They are also the ties that hold the frames in line during erection, before the sheeting goes on.
DSI sizes the secondary system together with the primary system, not after it. The bay spacing, the sheeting profile, the wind zone and the openings fix the purlin and girt spacing, the section and the thickness, so the cleats, flange braces and sag rods are on the shop drawings before any steel is cut.
- Roof purlin
- Z-section spanning rafter to rafter, carrying the roof sheeting
- Wall girt
- Z-section spanning column to column, carrying the wall sheeting
- Eave strut
- The corner member, seated on an eave strut clip at the column top
- Flange brace
- Angle from a purlin or girt to the inner flange of the rafter or column
- Cable bracing
- Diagonals in the roof and the wall of a braced bay
- Rigid frame
- The primary rafter and column the secondary members bear on
Part 01
Purlins
Roof members spanning from rafter to rafter, carrying the roof sheeting and bracing the rafters along their length.
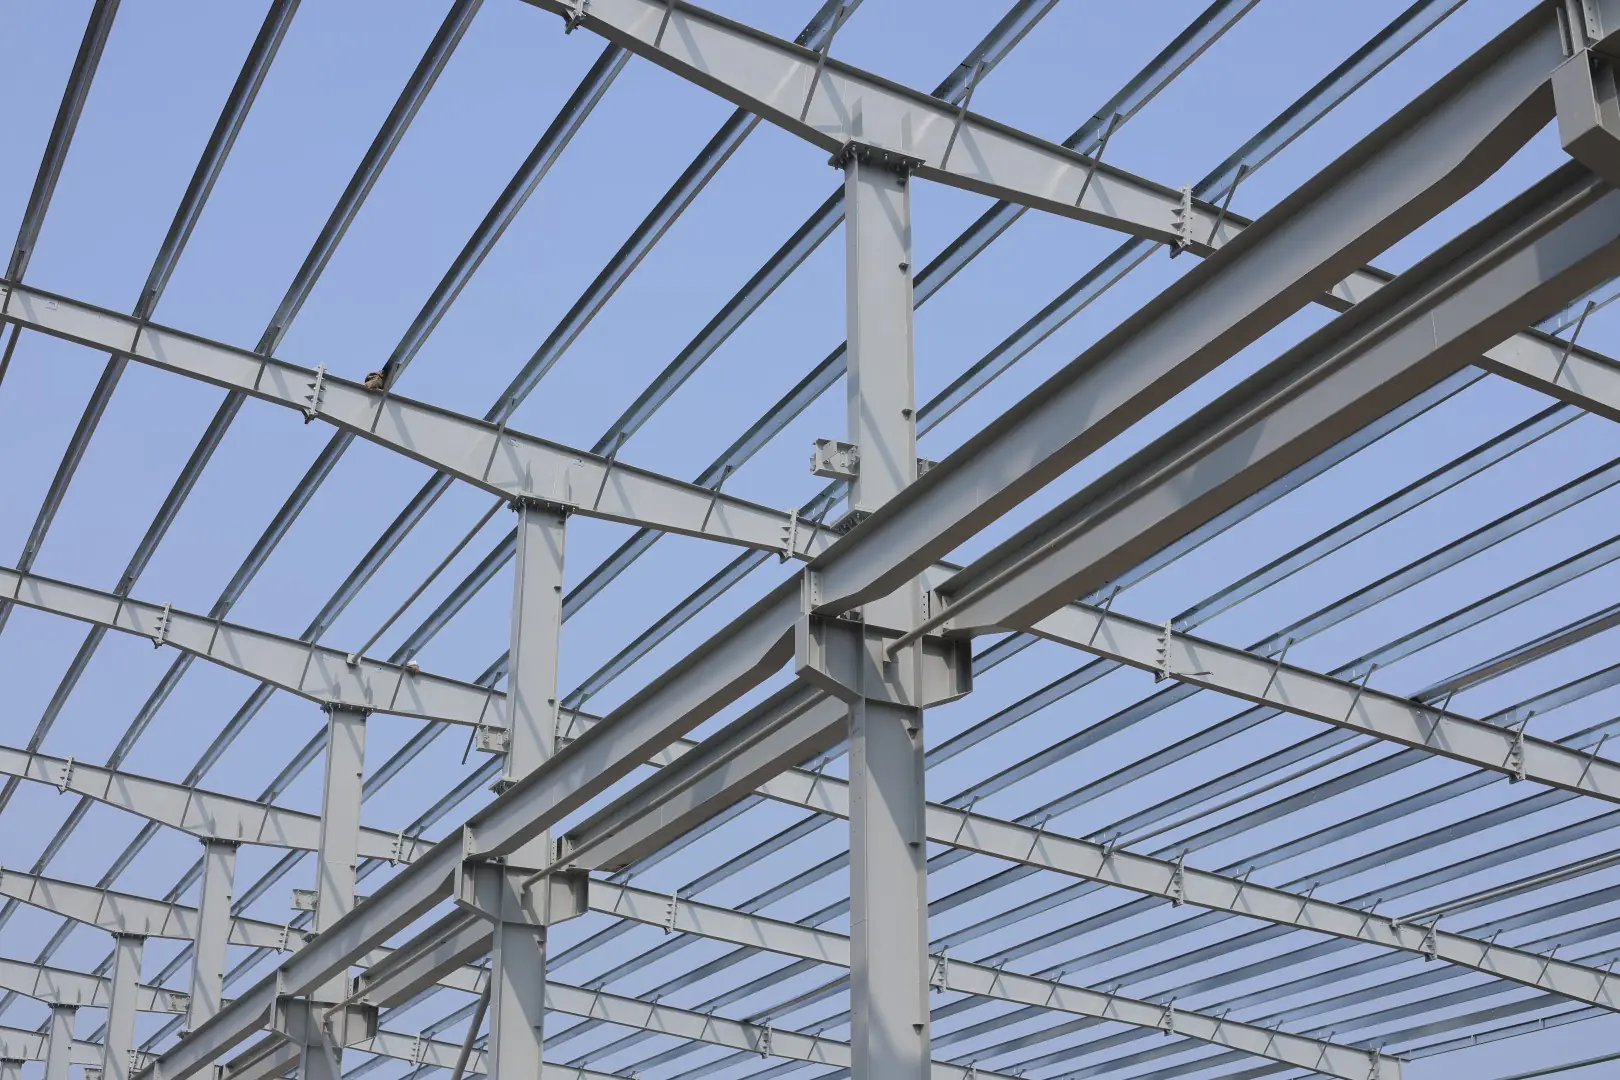
Purlins run along the length of the building, parallel to the ridge, at a regular spacing across the roof slope. Each one bears on a cleat welded to the top flange of the rafter and spans the bay to the next frame. The roof sheeting fastens to the top flange of the purlin, so the purlin spacing is set by what the sheet can span under wind uplift and foot traffic, not by the purlin itself.
DSI purlins are cold-formed Z-sections. A Z nests over the one behind it at every rafter, so the purlins are lapped and bolted through both webs over each support, which turns a row of simple spans into one continuous member. A continuous purlin is stiffer and carries more than the same section spanning bay by bay, and that is what lets the section stay light.
Sag rods between the purlins at mid-span or third points stop the sections rolling on the slope and hold them straight until the sheeting is fixed and the roof works as a diaphragm. Where the roof is a standing seam system, the purlins also carry the clips and the insulation spacers.
At a glance
- Section
- Cold-formed Z, lapped over the supports
- Material
- 345 MPa high-tensile steel
- Span
- One bay, commonly 8–10 m
- Connection
- Bolted to shop-welded cleats on the rafter
- Cold-formed Z-sections from 345 MPa high-tensile steel
- Lapped and bolted over each rafter for continuity
- Purlin spacing set by the roof sheeting span and wind uplift
- Sag rods and bridging to hold the sections in line
- Cleats welded to the rafter in the shop, bolted on site
- Flange braces from purlin to rafter inner flange where the design calls for them
Part 02
Girts
Wall members spanning from column to column, carrying the wall sheeting and bracing the columns.
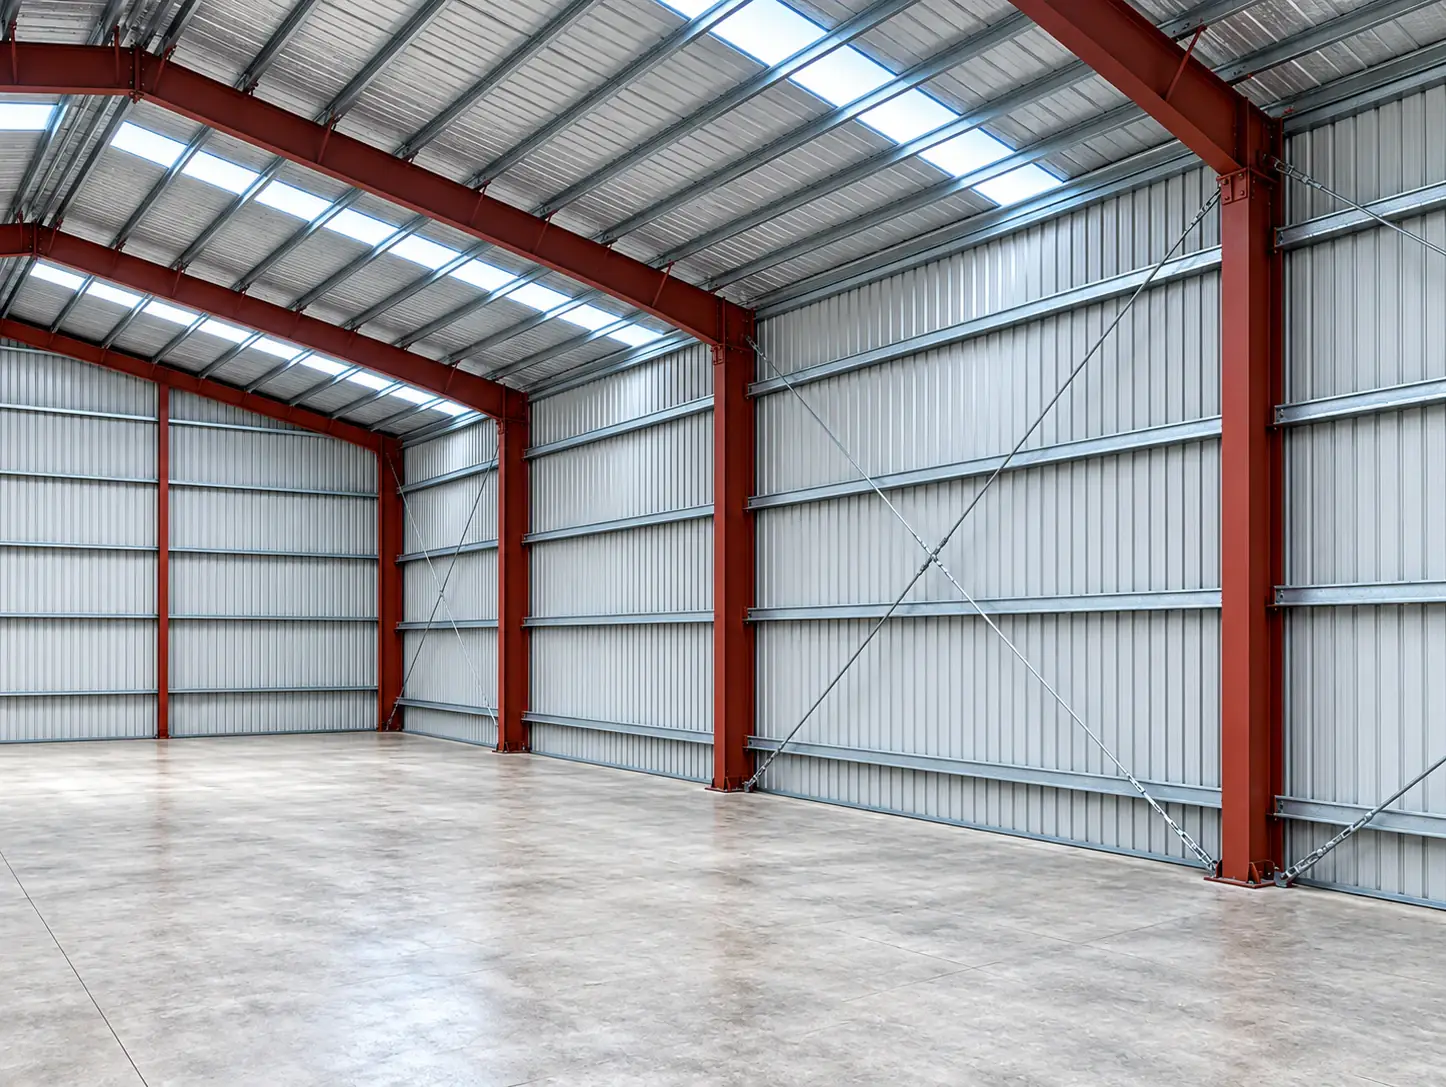
Girts are the purlins of the walls. They run horizontally along the sidewalls and endwalls between the columns, at a spacing set by the wall sheeting, and the sheet fastens to their outer flange. The lowest girt sits just above the plinth, the highest just below the eave strut, and the ones between are spaced around the doors, windows and louvers.
On the sidewalls DSI uses the same cold-formed Z-section as the roof, lapped over the columns for continuity. Where an opening interrupts the run, or at the endwalls where a girt frames from one post to the next, a C-section is used because it bolts to the face of the post without a lap. Girts are framed bypass, running outside the column flange so the sheeting is clear of the frame, or flush, set between the columns so the wall build-up is thinner.
Every girt braces the column it bears on. Flange braces from the girt to the inner flange of the column stop the compression flange buckling under the moment at the knee, so the girt spacing is checked against the column design and not only against the sheeting. Headers, sills and jambs of light sections frame the openings and carry the girt loads around them.
At a glance
- Section
- Cold-formed Z on the sidewalls; C at the endwalls and openings
- Material
- 345 MPa high-tensile steel
- Span
- Column to column, one bay
- Framing
- Bypass, outside the column, or flush, between the columns
- Z-section girts on the sidewalls, lapped over the columns
- C-section girts at the endwalls and around openings
- Bypass or flush framing to suit the wall build-up
- Framed openings for doors, windows, louvers and rolling shutters
- Flange braces from girt to column inner flange
- Sag rods to hold the girts level until the sheeting is on
Part 03
Eave struts
The member at the corner of roof and wall that carries the first purlin line and the top girt line, and ties the frames together along the eave.
The eave strut runs along the top of each sidewall column, where the roof slope meets the wall. It is one section doing three jobs: it is the last girt, carrying the top edge of the wall sheeting; it is the first purlin, carrying the lower edge of the roof sheeting; and it is a strut, tying every frame to the next along the length of the building.
Because it sits at the eave, the eave strut is a formed section with one flange set to the wall and the other to the roof slope, so both sheets land on a flat face. It bolts to the top of the column through a shop-welded cleat, and the eave gutter and its brackets hang from it.
The eave strut belongs to the bracing system as much as to the secondary system. In the braced bays it is the chord where the roof and wall X-bracing meet, so wind on the endwall and crane braking forces pass through it on their way to the foundations. It is sized for that axial force as well as for the bending from the sheeting.
At a glance
- Section
- Cold-formed eave section with flanges at the wall and roof angles
- Material
- 345 MPa high-tensile steel
- Position
- Along the top of the sidewall columns, at the eave
- Also carries
- Eave gutter, downspout brackets and the ends of the roof and wall bracing
- One section serving as top girt, first purlin and longitudinal strut
- Flanges formed to meet the wall and the roof slope
- Carries the eave gutter and its brackets
- Chord of the roof and wall bracing in the braced bays
- Sized for axial force from wind and crane braking as well as bending
- Bolted to the column top through a shop-welded cleat
Sections & details
Two profiles, and the parts that join them.
Every purlin, girt and eave strut is roll-formed into one of two profiles, and the same handful of details connects all of them to the frame.
Z-section
Purlins and sidewall girts
The flanges point in opposite directions, so one Z nests over the next at a support. Lapped and bolted over each frame, a run of Z-sections works as a continuous beam: stiffer, stronger and lighter than the same section spanning bay by bay.
- Roof purlins on every slope
- Sidewall girts
- Any run that crosses more than one bay
C-section
Endwall girts, framed openings, single spans
Both flanges point the same way, leaving a flat web that bolts to the face of a post or a jamb without a lap. Used where a member spans one bay only, frames an opening or has to sit flush with the frame.
- Endwall girts between the posts
- Headers, sills and jambs of openings
- Flush-framed girts and single-bay purlins
Laps
Z-purlins and girts overlap at each frame and bolt through both webs, so every run is continuous over its supports.
Cleats
Short plates welded to the rafters and columns in the shop, so purlins and girts bolt on site with no site welding.
Sag rods
Round bars between the purlins and girts at mid-span or third points, holding them straight and stopping them rolling on the slope.
Flange braces
Angles from a purlin or girt to the inner flange of the rafter or column, which are what let the tapered frame sections stay light.
Framed openings
Headers, sills and jambs of light sections that carry the girt loads around doors, windows, louvers and rolling shutters.
Fasteners and bridging
Every bolt, sag rod, bridging piece and flange brace is scheduled on the erection drawings and supplied with the frame.
FAQ
Questions about the secondary system.
For the frames the purlins and girts span between, see the Primary System. For cladding and accessories, see About PEB.
- Why cold-formed Z-sections rather than hot-rolled channels?
- A cold-formed Z is lighter than a hot-rolled channel of the same stiffness, and it laps over its supports so a run works as a continuous beam. Less steel goes into the roof and walls, and the frames carry less dead load. Hot-rolled sections are used only where a purlin or girt has to carry an unusual point load.
- What decides the purlin spacing?
- The roof sheeting. Each profile has a span it can cover under wind uplift and foot traffic, and the purlins are set at or inside that span. Insulation, daylight panels, roof monitors and the fixings of a standing seam system all narrow it. The girt spacing follows the wall sheeting in the same way.
- Can the girts sit flush with the columns?
- Yes. Bypass girts, which run outside the column flange, are the standard because they lap and stay continuous. Flush girts framed between the columns are used where the wall has to be thin, where a liner panel sits inside the girts, or where an opening needs a clean jamb. Both are detailed from the same drawings.
- Can openings be added after the building is up?
- A door or window can be cut into a wall later by re-framing the girts around it with a header and jambs, but a large opening in a braced bay moves the bracing and changes the load path. Openings planned at the design stage cost nothing extra; openings added later cost a site visit and a check of the frame.
Next step
Tell us what the roof and walls have to carry.
The sheeting, insulation, openings and site location are enough for DSI to fix the purlin and girt layout with the frame.